
You’ve got bathtub blueprints in front of you. They’re probably in PDF format, which may have seemed standard at the time. And you’re thinking, “The hell am I even looking at right now?” Yeah. We know. We get it. And we’ve been there. While blueprints are incredibly helpful, they’re not always the most user-friendly for those of us who just want to build our own bathtub.
Before you start to spaz, we’ve got some good news – you can take those blueprints and turn them into clear, visual guides. Converting PDFs into JPG images makes the designs easier to interpret.
Whether you’re a hobbyist, a first-time DIYer, or someone who just loves understanding the details before grabbing a tool, this guide walks you through everything. From understanding blueprints to converting and enhancing them, here’s an actionable guide to help you prepare. Let’s get it done.
Understanding Bathtub Blueprints
So you want to convert your PDF to JPG, huh? Stop. Wait. Hold on for a minute. Before you think about converting blueprints, you need to know what you’re working with. And why.
Blueprints are maps for construction. They contain all the technical details needed to replicate a design. They might include dimensions, materials, plumbing layouts, and structural specifications for your tub.
Here’s where they can start to feel like a puzzle.
The information in blueprints is coded in specialized symbols and scaled drawings, which are fantastic for accuracy but challenging to interpret without training. Those tiny, measured lines and notes look intimidating if you’ve never dealt with them.
This is why relying on PDFs can feel like looking at a Wheel of Time map without reading the books. Standard PDF viewers lack tools that highlight those intricate details. JPGs allow for editing, scaling, and zooming in a way that lets you tackle the nitty-gritty of the design without feeling overwhelmed.
Converting PDFs to JPGs
The first step in creating visual guides involves converting your blueprint PDFs into JPGs. Why JPGs? Because they’re:
- universally editable
- easy to view on almost any device
- and perfect for DIY enthusiasts looking to annotate their plans
You don’t need fancy or expensive software either. Several tools, including free ones, can help you convert PDFs to JPG images. Adobe Acrobat, Smallpdf, or Zamzar all work for this purpose.
Step-By-Step Guide
- Open the PDF – Locate your blueprint PDF file.
- Upload to a Converter – Use your trusty PDF-to-JPG converter tool. Upload the file to the converter platform of your choice.
- Set Quality Preferences – Select a high-resolution output to protect the integrity of the details. For blueprints, resolution is relevant because the quality will determine how readable fine lines and measurements are. Aim for at least 300 dpi.
- Convert and Download – Click “Convert.” Depending on your tool, you’ll receive a single JPG file or multiple images if your blueprint includes several pages. Click download.
- Store It for Access – Organize the JPGs in a folder that’s easy to access. Label them clearly to match each design section or element.
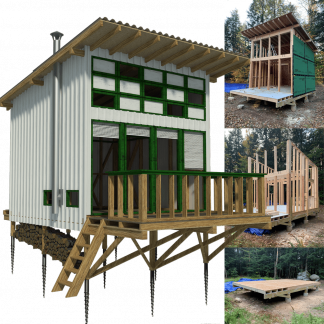
Pro tip: Keep backup copies in cloud storage so you can retrieve them anytime during your project. Plus, once you’re bitten by the DIY bug, it’s only a matter of time before you try your hand at something bigger, like a tiny house or a cabin.
Enhancing Visual Guides
Converting PDFs to JPGs is the first step. The next is to enhance these images to make them functional visual guides. The process makes your blueprints easier to read and work with when you’re out in the garage or at the hardware store.
Annotating the Images
Once your blueprints are in JPG format, it’s time to annotate key areas. Use tools within image editors or apps like Canva or Google Photos to make notes.
Mark measurements that might otherwise be hard to spot, highlight specific areas like plumbing fixtures, and call out sections that require special attention during assembly.
Organizing Sections
Break the blueprint into digestible parts. Divide the details into categories like dimensions, materials, and plumbing connections. Label them so you can reference them at a glance without having to stop working. For example, one image can focus entirely on the frame dimensions, while another focuses on finishing touches like material cuts.
Printing for Field Use
If you’re someone who prefers hands-on visuals, print out the JPGs. Lamination can help them stay intact as you work through your project, especially if you’re dealing with tools, sawdust, or water.
Bring Your Blueprint to Life
Bringing your blueprint to life will turn your interesting idea into reality step by step.
Staying organized, preparing detailed visuals, and making your plans user-friendly will set you up for success.
You’ll see your hard work pay off with the right preparation and a clear vision. Trust the process, stay patient, and enjoy the satisfaction of creating something with your own hands.